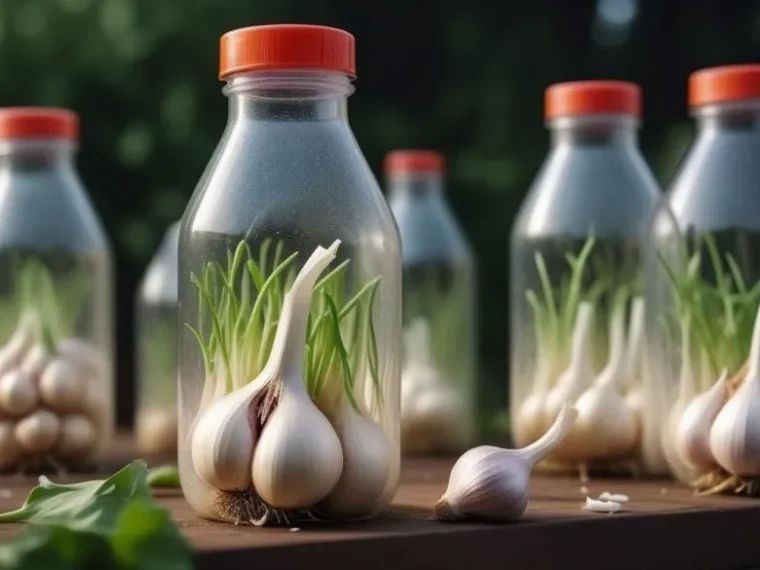
Garlic is an essential ingredient in kitchens worldwide, adding flavor and health benefits to many dishes. Growing your own garlic at home can be incredibly satisfying, especially when using creative and space-saving methods. One such method is growing garlic in plastic bottles, an innovative approach that allows you to cultivate garlic in limited spaces, like balconies or small gardens. This guide will walk you through the steps to successfully grow garlic in plastic bottles, ensuring you have fresh garlic available year-round.
Why Grow Garlic in Plastic Bottles?
Plastic bottle gardening is a practical and eco-friendly solution for those who want to grow garlic without access to large outdoor spaces. Some of the key benefits include:
- Space Efficiency: You can grow garlic vertically, making it ideal for apartment dwellers or small garden owners.
- Recycling: Repurposing plastic bottles helps reduce waste and is an environmentally friendly gardening practice.
- Control Over Growing Conditions: Growing in bottles allows you to manage water drainage and soil quality more effectively.
1. Materials Needed for Growing Garlic in Plastic Bottles
Before starting, you’ll need a few materials to ensure success:
- Plastic Bottles (2-liter size recommended): Clean and dry.
- Garlic Cloves: Use organic garlic for better results.
- Potting Soil: A well-draining soil mix, enriched with compost.
- Sharp Knife or Scissors: For cutting holes in the bottles.
- Watering Can or Spray Bottle: To keep the soil moist.
2. Preparing the Plastic Bottles
Step-by-Step Bottle Preparation
- Cut the Bottles: Using a sharp knife or scissors, carefully cut off the top section of the plastic bottle to create an opening. You should have a large enough space to fill the bottle with soil and plant your garlic.
- Create Drainage Holes: Poke several small holes at the bottom of the bottle to ensure proper drainage. Without drainage, excess water can lead to root rot.
- Add Layers: To improve drainage, place a layer of small pebbles or gravel at the bottom of the bottle before adding soil. This will help keep excess water away from the garlic roots.
3. Planting Garlic in the Bottles
Step-by-Step Planting Process
- Prepare the Garlic Cloves: Separate the garlic bulbs into individual cloves. Avoid peeling the skin off the cloves, as this helps protect them during the early growth stages.
- Plant the Cloves: Push each clove into the soil, pointy end facing up, and cover with about an inch of soil. Space the cloves 3-4 inches apart if using multiple bottles or layers within a single bottle.
- Water Gently: After planting, water the soil lightly. Make sure the soil is moist but not soggy.
Pro Tip: Use Vertical Bottle Planters
If you want to grow more garlic in less space, try using multiple bottles stacked vertically. Create holes in the sides of the bottles, allowing the garlic cloves to grow through the holes in a vertical arrangement.
4. Caring for Your Garlic Plants
Garlic needs consistent care to thrive. Here’s how to ensure your garlic grows strong and healthy in plastic bottles:
Watering
Garlic plants prefer evenly moist soil. Water when the top inch of soil feels dry. Be careful not to overwater, as garlic is prone to root rot if left in soggy soil.
Sunlight
Garlic requires at least 6-8 hours of sunlight each day. Place your plastic bottles in a sunny location, like a windowsill, balcony, or patio.
Fertilization
Garlic benefits from nutrient-rich soil. Add compost or a slow-release organic fertilizer every few weeks to promote healthy growth. You can also use liquid fertilizer diluted in water for easier absorption.
Pest Control
Garlic is naturally pest-resistant, but occasionally, you may encounter problems like aphids. Use a gentle organic insecticide or soapy water to keep pests at bay.
5. Harvesting Garlic from Plastic Bottles
Garlic is typically ready to harvest 7-8 months after planting. Here’s how to know when your garlic is ready and how to harvest it properly.
Signs of Readiness
- The lower leaves of the garlic plant will begin to turn yellow and die back.
- The stems may fall over slightly.
Harvesting Process
- Loosen the Soil: Carefully loosen the soil around the garlic bulbs using a small garden fork or spoon. Be gentle to avoid damaging the garlic.
- Pull the Garlic Bulbs: Grasp the stem of the garlic plant and gently pull the bulb from the soil. Shake off any excess dirt, but do not wash the garlic until you are ready to use it.
- Curing the Garlic: Allow the harvested garlic to cure in a cool, dry place for 1-2 weeks. Lay them out in a single layer to ensure air circulation. Once cured, trim the stems and store in a dry, dark area.
Conclusion: Sustainable Garlic Growing in Plastic Bottles
Growing garlic in plastic bottles is a simple, eco-friendly method that makes it possible to enjoy fresh garlic, even in small spaces. By following these steps, you’ll be able to successfully plant, care for, and harvest garlic right from the comfort of your home. Not only does this method provide fresh, organic garlic, but it also contributes to sustainability by reusing plastic bottles in creative ways. Whether you’re a seasoned gardener or just starting out, growing garlic in plastic bottles is a rewarding and resourceful project.


