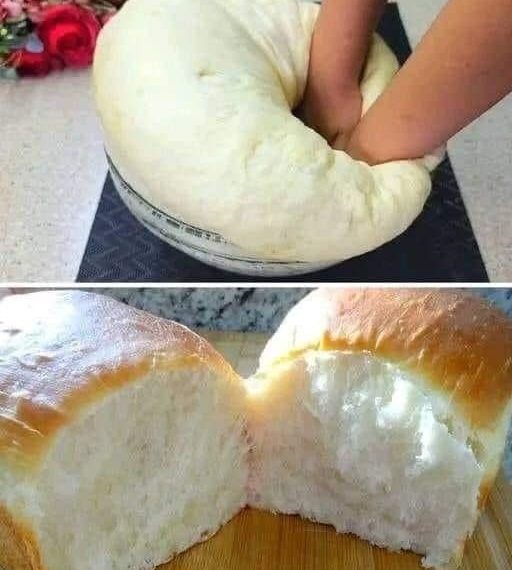
Nothing beats the smell of freshly baked bread wafting through your home. If you’ve ever wanted to make your own bread without the hassle of kneading, this recipe is perfect for you! It’s incredibly simple and requires only basic ingredients you likely already have in your kitchen. The best part? There’s no need for strenuous kneading—just mix, rest, and bake!
Things You’ll Need:
- Preparation time: 20 minutes (not including rest time)
- Rest time: 1 hour and 25 minutes
- Baking time: 25–30 minutes
- Total time required: About 2 hours and 15 minutes
Ingredients for the Recipe:
- Water: 200 ml (approximately 0.85 cups)
- Sugar: 25 grams (2 teaspoons)
- Yeast: 3 grams (1 teaspoon)
- Bread flour: 300 grams (2 cups)
- Salt: 3 grams (1/2 teaspoon)
- Olive oil: 20 grams (2 teaspoons)
Equipment:
- Baking mold size: A mold measuring 20.8 cm (8.2 inches) in length, 11.8 cm (4.6 inches) in width, and 11 cm (4.3 inches) in height, yielding a loaf weighing approximately 450 grams.
Baking Time and Temperature:
- Oven temperature: 170°C (340°F)
- Baking time: 25–30 minutes
Step-by-Step Recipe Blueprint
1. Prepare the Liquid Mixture
- In a large bowl, combine 200 ml (0.85 cups) of water, 25 grams (2 teaspoons) of sugar, and 3 grams (1 teaspoon) of yeast. Stir until the sugar and yeast dissolve completely. This liquid base will activate the yeast, setting the stage for your dough to rise.
2. Mix the Dry Ingredients
- Gradually add 300 grams (2 cups) of bread flour and 3 grams (1/2 teaspoon) of salt to the wet mixture. Stir well to combine until the dough starts to form. Make sure the dough is evenly mixed, but don’t worry about kneading it.
3. Incorporate the Olive Oil
- Add 20 grams (2 teaspoons) of olive oil into the dough mixture. Use a spatula to gently fold the oil into the dough until it’s fully incorporated. The olive oil will make the bread softer and add a subtle flavor.
4. Rest the Dough
- Cover the bowl with a clean kitchen towel or plastic wrap, and let the dough rest for at least 20 minutes. This step allows the dough to relax, activating the yeast for a better rise without the need for kneading.
5. Stir and Rest Again
- After the initial 20 minutes, give the dough a quick stir to smooth it out. This will help the dough rise more effectively during the next resting period. Then, cover it again and let it rest in a warm spot for 1 hour, or until it has doubled in size.
6. Prepare the Dough for Shaping
- Lightly dust a clean work surface with flour, or use a silicone baking mat to prevent sticking. Turn the dough out onto the floured surface and gently press it down to release any trapped air.
7. Shape the Dough
- Flatten the dough into a rectangle. Fold it in half four times and shape it into a smooth ball. This process helps with gluten development without needing kneading, ensuring your bread has a good structure.
8. Divide the Dough
- Divide the dough into three equal parts. Roll each part into a ball by tucking the dough underneath itself while turning it on the work surface.
9. Rest the Dough Balls
- Allow the dough balls to rest for another 15 minutes, covered with a kitchen towel. This final rest helps relax the gluten, making it easier to shape.
10. Shape and Place the Dough into the Mold
- After the resting period, roll each dough ball into a long strip. Fold in the edges, flatten one side, and roll it tightly from the thicker end. Pinch the seam to seal it. Repeat with the remaining dough.
- Place the shaped dough into your prepared mold (dimensions: 20.8 cm x 11.8 cm x 11 cm). Arrange the dough so the seams are facing down.
11. Final Proofing
- Cover the dough-filled mold with a cloth and allow it to rise for about 30 minutes, or until the dough has risen to about 80-90% of the mold’s height. The final proofing ensures the bread will have a light and fluffy texture.
12. Bake the Bread
- Preheat your oven to 170°C (340°F). Once the dough has risen, bake it in the oven for 25–30 minutes, or until the top is golden brown and the bread sounds hollow when tapped.
13. Cool and Serve
- Remove the bread from the oven and allow it to cool in the mold for a few minutes. Then, transfer it to a wire rack to cool completely before slicing. Enjoy your fresh, homemade bread!
Important Tips and Suggestions
1. Olive Oil Substitute
- If you prefer, you can substitute olive oil with other oils like canola, sunflower, or vegetable oil. This won’t change the structure of the bread, but it might slightly alter the flavor.
2. Monitor Baking Time
- Baking times can vary depending on the size of your mold and the specifics of your oven. Keep an eye on the bread while it bakes to ensure it doesn’t overbrown. If needed, adjust the temperature slightly for optimal results.
3. Enjoy Different Serving Options
- This bread is incredibly versatile! Enjoy it with butter, jam, or avocado for breakfast, or use it to make sandwiches, toast, or even bread-based appetizers.
4. Storage Suggestions
- At room temperature: Store the bread in an airtight container or bread bag for up to 3 days.
- Freezing: To extend its shelf life, wrap the bread in plastic wrap and place it in a freezer-safe bag. Bread can be frozen for up to 3 months. To thaw, simply leave it at room temperature or gently warm it in the oven.
Why This Recipe is So Great:
- No Kneading Required: Save time and effort—just mix, rest, and bake!
- Diet-Friendly: This recipe is perfect for those avoiding eggs or butter, making it suitable for vegans and those with certain dietary restrictions.
- Soft and Fluffy Texture: Thanks to the olive oil and resting periods, you get a wonderfully soft and fluffy loaf.
- Minimal Ingredients: Uses simple, pantry-friendly ingredients that are easy to find and affordable.
- Customizable: You can switch up the oils or add mix-ins like herbs, garlic, or seeds for a flavor twist.
Final Thoughts:
If you’re looking for an easy, budget-friendly, and delicious homemade bread recipe, this is the one for you! The soft, flavorful texture and simple process will make this bread a household favorite. Plus, once you see how easy it is to make, you might never want to buy store-bought bread again. Enjoy your homemade bread with any meal, knowing that you made it from scratch with minimal effort!


1 Comment
Why are these recipes shared on face book and not printable?? Not everyone has a smart or iphone that they can reference to in the kitchen while cooking. No apps to have to download either. There is enough other stuff downloaded on computers that just takes up space.