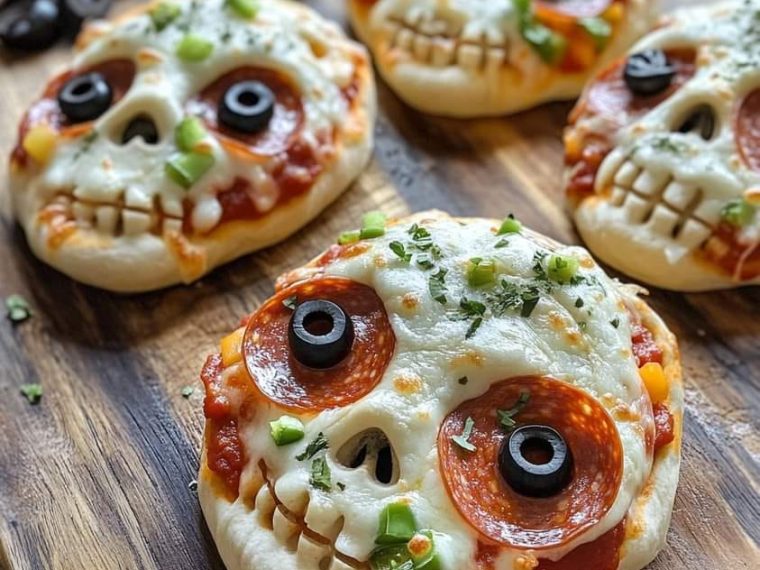
Looking to add a spooky twist to your Halloween menu? These Halloween Pizza Skulls are not only delightfully eerie, but they’re also deliciously easy to make. Whether you’re throwing a Halloween party or just want to surprise your family with a fun meal, these pizza skulls will steal the show. With a gooey cheesy filling and the classic pizza flavors you love, they’re sure to be a hit. Plus, they’re fully customizable!
Let’s dive into this easy-to-follow recipe!
Ingredients:
- 1 can refrigerated pizza dough
(You can use store-bought for convenience or make your own dough if you’re feeling adventurous!) - 1/2 cup pizza sauce
- 1 cup shredded mozzarella cheese
(Feel free to substitute with cheddar, provolone, or any other cheese you like.) - 1/2 cup pepperoni slices, chopped
- 1/4 cup black olives, sliced
- 1/4 cup green bell pepper, diced
- 1/4 cup red onion, finely chopped
- Cooking spray
- 1/2 teaspoon dried oregano
- 1/2 teaspoon garlic powder
Instructions:
1. Preheat the Oven for Perfect Results
Before starting the assembly, preheat your oven to 375°F (190°C). This will ensure your pizza skulls bake evenly.
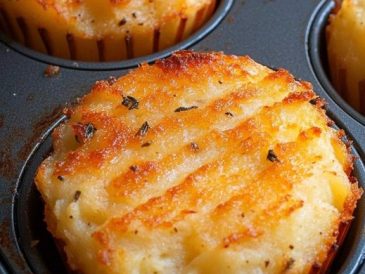
Lightly spray your skull-shaped mold with cooking spray. This step is crucial to prevent the dough from sticking and tearing when you try to remove the finished pizza skulls. Don’t have a skull mold? You can use a standard muffin tin or a mini bundt pan for similar results, though the spooky skull shape definitely adds to the Halloween fun!
2. Prepare the Dough
On a lightly floured surface, unroll the refrigerated pizza dough. You’ll want to cut the dough into pieces that are large enough to fit into each cavity of your skull mold while leaving a little extra dough hanging over the edges. This extra dough will help you seal the pizza skulls after filling.
If you’re using homemade dough, roll it out to about 1/8-inch thickness and cut into appropriate sizes.
3. Assemble the Pizza Skulls
Now comes the fun part—assembling your spooky pizza skulls!
- Press the dough pieces into each cavity of your mold, making sure there’s enough overhang for sealing later.
- Spoon in 1 tablespoon of pizza sauce into each dough-lined cavity.
- Add shredded mozzarella cheese, then layer in your fillings: chopped pepperoni, sliced black olives, diced green bell peppers, and finely chopped red onion.
- Feel free to get creative here! You can swap in other toppings like mushrooms, sausage, or even pineapple if you’re feeling adventurous.
- Top off each skull with a little more cheese to make sure they’re extra gooey.
4. Seal and Bake
Once your skulls are filled, it’s time to seal them up.
- Fold the extra dough over the fillings, pinching the edges to ensure a good seal. You want to make sure nothing leaks out during baking.
- Brush the tops with a little olive oil to give them a golden, crispy finish.
- Sprinkle with dried oregano and garlic powder for that extra hit of flavor.
Place your mold in the oven and bake for 20-25 minutes, or until the skulls are golden brown and the dough is fully cooked through.
5. Cool and Serve
After baking, let the pizza skulls cool in the mold for about 5 minutes. This will make them easier to remove without tearing. Use a small spatula or butter knife to gently lift the pizza skulls out of the mold.
Serve warm and enjoy watching everyone’s reaction to these spooky, cheesy skulls!
Tips for Perfect Pizza Skulls
- Customizing Your Fillings: You can easily switch up the fillings to suit your taste. Try adding Italian sausage, mushrooms, spinach, or even pineapple. For a vegetarian version, skip the pepperoni and add more veggies like mushrooms, zucchini, or tomatoes.
- Different Cheeses: While mozzarella is classic, feel free to experiment with different cheeses like cheddar, provolone, or gouda for a unique flavor.
- Make Them Extra Spooky: Want to add a little more creep factor? You can use thin slices of mozzarella to create a “mummy wrap” effect or place black olive slices in the eye sockets before baking to mimic eerie eyeballs.
- Dipping Sauces: Serve your pizza skulls with extra pizza sauce, ranch dressing, or garlic butter on the side for dipping.
Why Pizza Skulls are the Ultimate Halloween Treat:
These pizza skulls are more than just a cool, creepy addition to your Halloween table. They’re also:
- Fun for kids: Kids will love helping to stuff the pizza skulls with their favorite ingredients. It’s a fun family activity that adds to the Halloween spirit.
- Customizable: You can fill the pizza skulls with whatever toppings you prefer, making them perfect for picky eaters.
- Party-Ready: These are an ideal finger food for Halloween parties. Serve them as appetizers or make a double batch to feed a crowd.
Serving Suggestions
For a complete Halloween feast, pair your pizza skulls with:
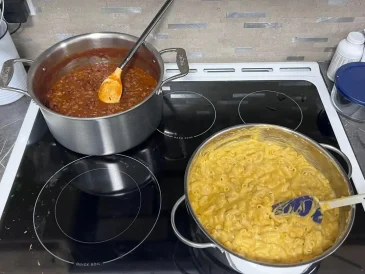
- Monster Mac & Cheese: Add some food coloring to make your macaroni glow or look like a monster!
- Witch’s Brew Punch: A spooky drink made with lime sherbet, soda, and gummy worms.
- Ghostly Cupcakes: Top cupcakes with marshmallow ghosts for a sweet finish.
Storage and Reheating
If you happen to have any leftovers (though it’s unlikely!), store your pizza skulls in an airtight container in the refrigerator for up to 3 days. To reheat, simply pop them in the oven at 350°F for about 10 minutes to crisp up the dough again.
Conclusion
These Halloween Pizza Skulls are the perfect combination of fun, spooky, and delicious. They bring together the best of both worlds: the creative thrill of Halloween and the comfort of a cheesy, pepperoni-stuffed pizza. Whether you’re serving them at a party or making them for a family dinner, these pizza skulls are sure to be a hit with both kids and adults.
So grab your ingredients, dust off your skull mold, and get ready to wow your guests with these spine-chilling (but oh-so-tasty) Halloween pizza skulls!

1 Comment
I love these Halloween Pizza’s. Where can I purchase the skull mold?
Thank you