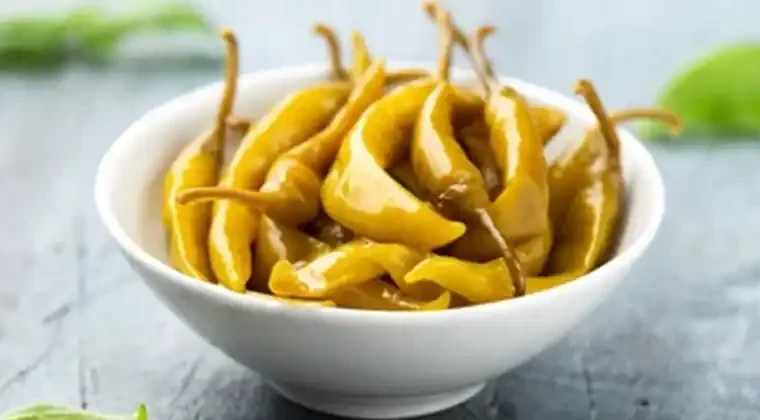
Pickling vegetables is a time-honored way to preserve seasonal produce while enhancing their flavors with a tangy and spicy kick. One of the most popular vegetables to pickle is the hot pepper. Not only does it add heat to your meals, but it also balances flavors with a delightful mix of sour, salty, and spicy. In this recipe, we’ll show you how to pickle light green hot peppers, following a traditional method that uses basic ingredients you likely already have in your kitchen.
Why Pickled Hot Peppers?
Pickled hot peppers are versatile and can be used in a wide range of dishes. They can spice up sandwiches, salads, burgers, or grilled meats. Whether you’re a fan of mild heat or prefer a more intense spice, these pickled peppers offer a balance of flavors that can elevate any meal. Best of all, this recipe is simple, requires no special equipment, and results in jars of flavorful, preserved peppers that can last for months.
Ingredients:
To make this recipe, you will need the following ingredients:
- 1 kg of light green hot peppers (any variety you prefer)
- 4 tablespoons of salt
- 1 tablespoon of sugar
- 1 liter of water
- ½ cup of white vinegar (for extra tang)
- 6–8 whole garlic cloves (optional but recommended)
- 1 lemon (cut into slices)
- 2 liters of plastic bottles for the initial pickling
- Glass jars for long-term storage
Step-by-Step Instructions
1. Preparing the Peppers
Start by thoroughly washing the light green hot peppers. After they are clean, carefully cut them lengthwise down the middle. You want to keep the peppers intact while creating an opening that will allow the brine to soak in. This step is crucial as it helps the flavors from the brine permeate the peppers more effectively during the pickling process.
Once cut, place the peppers into clean, dry plastic bottles. The recipe traditionally uses 2-liter plastic bottles, which are perfect for this process because they allow the peppers to stay submerged in the brine and ferment properly.
2. Preparing the Brine
In a large mixing bowl, dissolve 4 tablespoons of salt and 1 tablespoon of sugar in 1 liter of water. Stir the mixture until the salt and sugar are fully dissolved. This is the brine that will ferment the peppers, infusing them with a salty, tangy flavor.
The sugar is added to balance the salty and sour taste and can be adjusted according to your preference. Some people prefer their pickles to be slightly sweeter, while others prefer a stronger brine.
3. Filling the Bottles
Once your brine is ready, carefully pour it into the plastic bottles containing the peppers. Make sure the peppers are fully submerged in the brine. Seal the bottles tightly with their caps, and shake them gently to ensure the brine is evenly distributed.
4. Letting the Peppers Sit
Now comes the fermentation part. Place the bottles in a warm, sunny spot and let them sit for two days. The heat helps speed up the fermentation process, allowing the peppers to absorb the brine’s flavors quickly. If you live in a cooler climate or don’t have much sunlight, you can leave the bottles at room temperature for a few more days.
5. Draining the Liquid
After two days (or once you notice the peppers have softened slightly), open the bottles and carefully drain the liquid. This step helps to remove the initial brine, which can sometimes be too salty or overpowering after fermentation. Don’t worry—this isn’t the final pickling liquid, but a necessary step to prepare the peppers for the next stage.
6. Preparing the Final Pickling Mixture
Now, it’s time to make the final brine that the peppers will sit in for long-term storage. In a large bowl, combine:
- ½ cup of white vinegar
- Enough water to fully submerge the peppers
- A few more garlic cloves for flavor
- Slices of lemon for a fresh citrusy kick
Mix everything together thoroughly. The vinegar not only enhances the flavor but also preserves the peppers for a longer period, giving them a distinct tang.
7. Transferring the Peppers to Jars
Now that your second brine is ready, it’s time to transfer the peppers from the plastic bottles into glass jars. Glass jars are ideal for long-term storage because they don’t react with the vinegar or other acidic ingredients. Add the peppers and pour the final brine mixture over them, making sure they are completely submerged.
You can add a few extra slices of lemon and garlic to each jar for a burst of extra flavor. If you prefer a spicier pickle, you can also add a few chili flakes or whole peppercorns at this stage.
8. Storing and Serving
Once the jars are filled and sealed, store them in the refrigerator. The peppers can be enjoyed as soon as the next day, but for the best flavor, let them sit for at least one week before serving. This allows the flavors to fully develop, giving you perfectly pickled peppers with just the right amount of heat and tang.
Your pickled hot peppers can last in the refrigerator for up to one year. As they sit, they will continue to ferment slightly, becoming even more flavorful over time.
Additional Tips:
- Customizing the Heat: If you prefer a milder pickle, use a milder variety of peppers or remove the seeds before pickling. For a hotter version, keep the seeds and add extra chili peppers.
- Using the Pickling Liquid: Don’t throw away the brine! The leftover liquid can be used as a tangy base for salad dressings, marinades, or even a refreshing drink when diluted with water.
- Serving Ideas: Pickled hot peppers pair beautifully with grilled meats, sandwiches, salads, and even on pizza. They add a spicy and sour element to any dish, making them a versatile condiment.
Conclusion:
Pickling hot peppers is an easy, rewarding process that allows you to enjoy their tangy, spicy flavor all year long. With just a few simple ingredients and some patience, you can create jars of delicious pickled peppers that will add zest to any meal. Whether you’re new to pickling or looking to try a new recipe, this method is foolproof and will quickly become a household favorite. Give it a try today, and enjoy the rich flavors of homemade pickled peppers!
