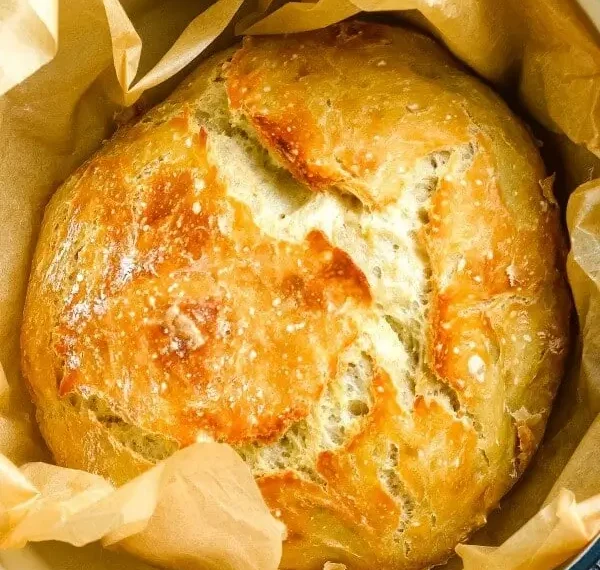
Few things are more comforting than the smell of freshly baked bread wafting through your kitchen. With its crusty exterior and soft, airy interior, homemade bread has a certain charm that store-bought loaves just can’t replicate. If you’ve ever wanted to try making bread at home but were intimidated by the kneading process, then No-Knead Bread is the perfect recipe for you.
This method eliminates the need for hours of kneading, and it still delivers a loaf that’s crispy on the outside and tender on the inside. Whether you’re a baking newbie or a seasoned pro, this recipe is sure to impress. Let’s dive into how you can make this simple and delicious bread with just a few ingredients and minimal effort.
What is No-Knead Bread?
No-Knead Bread is a technique that allows you to make bread without the need to knead the dough, which is often the most labor-intensive part of the process. Instead, it relies on a long fermentation period that develops the dough’s texture and flavor. The result? A rustic, flavorful loaf that you don’t have to work hard for!
The dough is wetter and stickier than traditional bread dough, and it uses minimal yeast. This method makes the bread’s texture light and airy, with a chewy interior and a golden, crisp crust.
Ingredients for No-Knead Bread
To make this bread, you’ll need just a handful of basic ingredients that you probably already have in your kitchen:
- 3 cups all-purpose flour
- 1 ½ teaspoons salt
- ¼ teaspoon instant yeast
- 1 ½ cups room temperature water
That’s it! No fancy ingredients, just the basics. The magic happens during the long fermentation process, where the yeast does all the hard work while you relax.
Step-by-Step Guide to Making No-Knead Bread
1. Mix the Ingredients
In a large bowl, combine the flour, salt, and yeast. Add the water and stir until the mixture forms a shaggy, sticky dough. Don’t worry about making it smooth—this dough will be a bit messy.
2. Let the Dough Rise
Cover the bowl with plastic wrap or a clean kitchen towel. Leave the dough to rise at room temperature for 12-18 hours. Yes, you read that right—this is a slow fermentation process, but it’s what gives the bread its fantastic texture and flavor.
3. Preheat the Oven and Pot
After the dough has risen, it’s time to heat up the oven. Preheat your oven to 450°F (230°C). Place a 6 to 8-quart heavy covered pot (such as a Dutch oven) in the oven while it heats up. Let the pot warm for about 30 minutes. This step helps create the perfect environment for baking the bread, ensuring a crispy crust.
4. Shape the Dough
While the pot heats, transfer the dough onto a well-floured surface. Use your hands to gently shape the dough into a ball. Be careful not to overwork the dough—just form it into a round shape and place it on a sheet of parchment paper. Loosely cover the dough with plastic wrap.
5. Bake the Bread
Once the pot is hot, carefully remove the plastic wrap from the dough. Using the parchment paper, lift the dough and place it into the pot. Be cautious, as the pot will be extremely hot. Cover the pot with the lid and bake for 30 minutes.
After 30 minutes, remove the lid and continue baking the bread for another 10-15 minutes, or until the bread has a golden-brown crust.
6. Cool and Enjoy
Once your bread is done baking, carefully remove it from the pot and place it on a cooling rack. Let it cool slightly before slicing into it. The bread will have a crispy, crackling crust and a soft, tender interior.
Troubleshooting No-Knead Bread
Why is my bread so dense?
If your bread is too dense, it may be because there was too much flour. Remember, the dough should be sticky, not dry. Resist the urge to add more flour as it can affect the bread’s texture. Also, humidity and the age of your flour can impact the density.
Why is my bread gummy inside?
Gummy bread usually means that the inside hasn’t fully cooked before the crust forms. Make sure your oven temperature is accurate, and try baking for a few extra minutes if needed.
Why is my bread flat?
A flat loaf can happen if your yeast is expired or the water was too hot and killed the yeast. Always check the expiration date of your yeast and use water that’s warm, not hot, for best results.
Final Thoughts
No-Knead Bread is the perfect recipe for beginners and experienced bakers alike. It’s simple, foolproof, and gives you a delicious loaf every time. Whether you’re enjoying a warm slice with butter, making sandwiches, or pairing it with soup, this crusty bread is sure to become a staple in your kitchen.
So, why not give it a try? With just a few ingredients and minimal effort, you can create a loaf of bread that rivals anything from the bakery. Happy baking!
Let me know how your loaf turns out—I’d love to hear about your experience! Have any questions or tips? Feel free to leave a comment below!


